An easy way to remove gel polish at home
Today there are many options for nail coating. One of them is gel polish. For some reason, he is the one who is more popular with girls. The salons have a huge selection of coating palettes. They look beautiful and do not require correction for 3-4 weeks. The coating is applied monthly or more often, so it has to be removed the same number of times.
There is a rumor among manicurists that only a professional can remove it and it is impossible to do it yourself at home. Let's dispel this myth. What equipment and material should be used to safely remove gel polish at home, and why the myth arises about the fragility of the plates after such manipulation is given below.
Removing gel polish at home
In cases where you decide to refuse nail extensions or because of time you do not have time to visit your specialist for correction, you can remove the gel yourself at home. There is no need to acquire additional knowledge and skills for such a procedure.
It is worth noting that gel polish is more difficult to remove than regular polish. The gel structure penetrates into the top layer of the nails. Strong mechanical impact can cause harm. Nobody needs such consequences. Be especially careful with stripping equipment. A better quality product may cause less damage to the nail.
Necessary equipment
At home, you can use professional products or what is available in every apartment. These include:
- nail polish remover. The liquid must contain acetone. Do not try to use a product that does not contain acetone. The coating will not budge. Extra time and money will be wasted;
- foil can be taken from chocolate bars or used for baking in the oven at home. In the first option, you will most likely have to buy two or three chocolates;
- an orange spatula is sold in any store specializing in nail cosmetics or cosmetics store;
- cotton wool Both cotton pads and a regular one in a tube are suitable. The use of disks is more convenient;
- glass file. Scientists have proven that when grinding down natural nails, this type causes less damage. Do not use a Soviet-era iron nail file under any circumstances;
- nail file for polishing the nail plate and polishing the gel. The tool will help give your nails a well-groomed look;
- desk lamp.
Everyone can choose for themselves how to remove the sticky layer from gel polish.
If desired and financially possible, you can purchase a gel polish remover in a specialized store.
Liquid with acetone will yield to remover. Instead of cotton wool - windings. Such purchases are optional. If you are removing gel polish for the first time at home, and do not plan to carry out this procedure yourself often, then they will be unnecessary for you.
How to remove gel polish at home?
You should not start removing gel polish right away, without additional preparation. Stages of removing gel polish at home:
- We carry out the preparation procedure. File off the glossy finish. It is enough to go over the gel polish several times;
- Lubricate your fingers up to the second phalanx with cream. Any cream for the body, face or hands will do. This will prevent the acetone from harming the skin;
- The nail polish remover should be absorbed into the cotton wool, but not dripping from it. Place on the surface of the nail plate, wrapping it in foil. This way, the liquid will not be able to evaporate, and the cotton pad will be pressed more tightly to the nail. Do this with all fingers of one hand and leave for 10-15 minutes. If you bought a remover (professional gel remover), 5-10 minutes is enough. It will take just that long for the gel to swell and peel off. It washes without problems;
- After the time has passed, remove the foil and cotton wool. If there is gel left in some places, the residue can be removed with an orange stick. Iron devices are not suitable, as they can further injure the nail plate. Do not release all your fingers at once. Gel polish may harden when exposed to air, requiring you to reapply liquid and other tools. Attention, if there is a large amount of remaining gel, do not actively remove it mechanically. Repeat the steps again;
- repeat the procedure for the other hand;
- Having finished removing the gel polish, use a nail file to polish natural nails;
- Wash your hands under warm water. You can lubricate the cuticle with special oil and your hands with cream. If you don’t have such oil in your arsenal, olive oil will do. It is also rich in vitamins;
- give the desired shape using a glass nail file and cover with regular varnish. To restore, it is better to use a specialized nail strengthening varnish. It can be purchased at any pharmacy or cosmetics store.
Thus, removing gel polish at home is completely easy. The manipulation will take a little time and will not require a financial investment. If removed correctly, the cuticle and nail plate will not be injured by the product. On average, removal takes 30-50 minutes. This can be done while watching a movie or your favorite TV series.
Nail masks after removing gel polish
After removing the gel polish, the nails may become thinner after mechanical filing. To restore, you can treat your nails with masks. What will help in restoring nails:
- olive oil. Olive oil baths are suitable for restoring thinned nails after polishing with a file. After warming it up to room temperature, dip your fingers in it for 10 minutes. Repeat the procedure for 7-10 days;
- lemon juice. Vitamin C in combination with essential oil will add shine to your nails and strengthen them. Squeeze the juice from the lemon and rub it into the surface of the plate. 10 minutes is enough. The procedure should be repeated for 7-10 days;
- sour berries. It is berry acid that will help get rid of split nails. Grind cranberries, red currants or other sour berries. Apply the resulting mixture to your nails for a few minutes. Afterwards, rinse with water and apply nourishing cream to your hands. Repeat the procedure 5-7 times.
Such masks will help strengthen and restore nail plates. The main thing is not to forget to check for any allergic reaction to the components before carrying out any procedure.
Mistakes when removing gel polish at home
The question arises: why does the myth about the dangers of nail extensions arise? A mistake that every girl has made at least once is removing the gel by peeling it off the nail plate, rather than using nail polish remover. The first option is often found when one nail breaks off or when removing gel polish out of ignorance. Needless to say, in doing so you are mercilessly harming them.
Consequences of improper removal of the coating:
- nail coating becomes dry;
- the nail plate becomes thinner;
- delamination occurs.
It is because of such barbaric removal that the myth about the dangers of gel polish on nails is born. As mentioned above, the gel penetrates the top layer of the stratum corneum when it dries and is fixed on it. With strong mechanical impact, including large filings, the nail itself is damaged. This is how the problems mentioned above arise.
If you follow all the rules and regulations, your nails will delight you with their beauty and durability, even if you remove the gel coating yourself at home.
Source: https://nogotochie.ru/manikyur/prostoj-sposob-snyat-gel-lak-doma.html
How to remove varnish from wood - an overview of popular methods
Often, before painting or re-varnishing a wooden surface, it is necessary to remove the old layer of varnish. There are several ways to do this: wood varnish remover, mechanical method, heat treatment. Choosing a specific option often causes certain difficulties, since a person without skills is rarely able to decide on his own. The result of this is damage to the processed material.
Before painting or re-varnishing a wooden surface, it is necessary to remove the old layer of varnish.
Below we will talk about the main methods of removing nail polish, as well as the advantages and disadvantages of certain approaches.
Nail polish removal methods
It must be said right away that only the most popular surface cleaning methods are covered here. There is no universal recipe that is applicable in all situations.
The choice of method depends on many variables, including:
- The type of base is of considerable importance, since it makes a difference what exactly needs to be cleaned - furniture or parquet.
- Varnish composition. Different options are relevant for different compositions.
- Layer thickness. It's one thing to remove one layer, quite another to remove many old layers.
Treatment with chemical compounds
Treating wooden surfaces with chemicals (also called stripping) is one of the most popular methods of removing varnish when it comes to delicate surfaces of furniture or other delicate objects. The chemical compositions can be powders, gels, specialized liquids or a regular solvent.
The choice of a specific option depends on the task at hand. When it comes to shellac, denatured alcohol is best. Liquids are most applicable to surfaces where there are not many layers - up to three.
The fact is that the liquid tends to erode quickly, which is why it is simply not able to absorb deeply enough. Powder chemistry is the best choice for large-scale work, since such materials can be preserved for a long time.
But gels and paste-like materials are best suited for removing a significant number of layers of varnish or paint.
Denatured alcohol is best for removing shellac.
Recommendation: powders are created in this consistency for ease of storage and transportation. They should be used diluted with water to form a thick paste-like mass.
It is best to apply the mixture in a vertical position. This is not only more correct from a technological point of view, but also more convenient. Gels and pastes can remove up to a dozen layers of old coating at a time.
Instructions for removing varnish from a wooden surface
The entire coating removal process consists of four stages.
First stage: applying wash
We wet the brushes in the chemical composition and apply a decent layer to the surface. We proceed from the rule that the brush should be passed over one place only once, without repetition.
Second stage: film
To enhance the washing effect, we organize a compress, for which we cover the surface to be treated with a polyethylene film. The average waiting time for the effect of a compress is from 1 to 4 hours, depending on how many layers are to be removed. A good sign is if the remover changes color and becomes dark brown or brownish, and the varnish begins to swell.
Third stage: removing varnish
After the varnish has become softer, it must be removed with a spatula. The edges of the new spatula are too sharp. Therefore, it is recommended to round them slightly using a sharpening stone. This will make working with wood more accurate.
The pressure on the swollen material must be careful. You probably won't be able to completely get rid of the varnish in one go. Then you need to repeat the operation again. However, it happens that one pass with sandpaper is enough to remove the remaining varnish film.
Fourth stage: neutralization of the chemical composition
Do not forget that the chemical composition remaining on the wooden surface must be washed off either with plain water or with vinegar solution (500 grams of water per 100 ml of vinegar).
You need to wash off the remaining chemicals thoroughly, but not for too long, since moisture is harmful to wood, and the surface being treated at this time is deprived of protection. As soon as the washing is completed, the surface should be wiped well, and then the item should be moved to a dry and ventilated place.
Moreover, direct rays of the Sun should be avoided. After drying, the wooden product can be re-varnished.
The chemical composition remaining on the wooden surface can be washed off with plain water or vinegar solution
In addition to liquids, spray cans are also used. As a result of spraying the spray, a foam layer appears on the surface being treated. Sprays are easy to use, however, their disadvantage is the ability to wash off only minor layers.
Important! Work with chemical compounds must be carried out in compliance with safety rules. The room must be well ventilated. For protection you need to use special gloves and respirators.
Acetone is also used as a solvent. First of all, a fabric compress is made, thoroughly soaked in acetone. Then the compress is applied to the areas intended for cleaning. Cover the compress with plastic wrap and wait 10-15 minutes.
Note! Removing the varnish layer on furniture or chipboard panels can damage the surfaces, as the decorative film can be damaged. The best material for removing varnish is natural wood.
Mechanical cleaning
The essence of the technique is surface scraping. In other words, this is stripping off the varnish layer using a construction tool - a tsikli, which is a sharpened steel plate with a handle. Moreover, the handle is at an angle to increase pressure on the surface. You can purchase a cycle or make it yourself.
You can remove varnish from a wooden surface using a scraper.
You can do without a special tool by using glass. But this device has a drawback - it quickly becomes dull. If you choose glass, you need to remember to use protective gloves to avoid getting hurt.
If the varnish layer is thin, you can use regular sandpaper. Moreover, it can be used either manually or by attaching sandpaper to an angle grinder. There are three types of grinding machines:
- tape;
- vibration;
- eccentric.
Vibrating machines are the most affordable. This tool can be used to clean furniture.
The working process is as follows: sandpaper is installed on the “sole”, which is used to process the surface. This method of removing varnish is very dusty, but compared to manual processing, this option will give a much more aesthetic surface.
Advice! Don't forget to protect your surroundings from dust. Plastic film will do for this.
The main advantage of mechanical processing compared to chemicals is that toxic and unpleasant-smelling substances are not used. In addition, if you work carefully, this method of cleaning is more gentle on the wood than in the case of chemical compounds. Mechanics have one drawback - the process is long and labor-intensive.
The main disadvantage of mechanical processing is that the process takes a lot of time and effort.
Advice! Since mechanical cleaning takes a lot of time and also requires accuracy, it may be more rational to use the services of a hired specialist. In addition, the specialist is equipped with professional equipment, which will improve the quality of work.
Heat treatment
The essence of this process is to heat the wooden surface, due to which the varnish adheres less firmly to the surface. In other words, the varnish begins to crack, after which it can be pryed off with a tool (a chisel or spatula will do) and slowly removed.
Please pay attention to the following nuances:
- During work, you need to use protective equipment (gloves and goggles), and also ventilate the room. The fact is that when heated, the varnish releases toxic substances, and when the material is mechanically separated, pieces can bounce off of it. Also, do not forget about fire safety.
- If the varnish is heated up, but does not peel off, but becomes charred, you need to change the cleaning method and you cannot do without chemicals.
Required tools:
- Gasoline or gas burner. Such devices are quite inexpensive. However, the burner must be used with extreme caution, as the work will be carried out with an open flame.
Care must be taken when working with the burner
- Construction hairdryer. The device is similar to a household hair dryer, but has significantly greater temperature capabilities, heating up to 600 degrees.
Note! A standard household hair dryer is not suitable for removing nail polish.
The main advantage of the thermal method is its high speed. However, we must not forget about the danger of overheating the varnished surface, since in this case it may catch fire.
The work is done with both hands: one holds the hairdryer, which heats the surface, and the second holds a spatula for removing nail polish.
Conclusion
In most cases, you can clean the varnish yourself. If you lack confidence in your own skills or the work is too delicate, it is best to turn to specialists.
Source: https://kraska.guru/laki/rabota-s-lakami/snyat-s-dereva.html
How to quickly remove nail polish
A beautiful manicure and well-groomed hands give the image sophistication and neatness. What to do when the manicure is already in an unsightly state, and the glitter just doesn’t want to disappear, we’ll tell you in this article.
Oily hand cream
In order to avoid drying out the skin when removing nail polish, you need to use any rich cream. It is especially important to protect the cuticle for those girls who suffer from dryness. This often happens even despite high-quality and regular care. Our hands are constantly exposed to temperature changes and other negative influences.
Vaseline, shea butter or coconut oil also cope well with this task. As a last resort, cuticle care oil itself will do. You just need to apply the product to the side rollers and cuticle area. It's okay if the cream gets on the nail bed. This method will perfectly moisturize the skin and prevent aggressive nail polish removers from negatively affecting it.
Scotch tape or masking tape
Covering your nails with varnish, no matter how you look at it, is a skill that requires practice. Sometimes during application of the coating, the skin around the nail becomes stained with varnish. And to prevent this from happening, a special liquid tape is often used, which prevents the varnish from getting on the skin and is removed with a film.
By analogy with this method, you can also remove glitter from the skin. Just need to use not liquid tape, but tape or any other sticky tape. This method will help you easily and quickly remove any remaining polish around the nail.
Jar with sponge
Most of us have seen in the cosmetic departments of stores a special jar for removing nail polish. Its essence lies in the fact that in the container there is a sponge made of finely divided material, which is generously soaked in acetone.
With the help of this jar, the problem of finding cotton pads, nail polish remover and unpleasant odors will be solved. You just need to dip your finger into the bottle and wait a little. The cleanser will do everything for you.
You can make such a remedy yourself. All you need is to find a suitable jar made of glass or plastic, place a sponge in it, cut it to the size of the container and soak it in nail polish remover. In this way, glitter polish, like any other polish, will be removed in a matter of seconds.
Foil hats
It also happens that you don’t collect empty cans, but the glitter varnish needs to be removed as quickly as possible. Then unique nail caps made of foil come to the rescue, which are well known to those who regularly apply gel polish to their nails.
This method is simple and inexpensive. Foil is almost always available at home, and to use this method you only need three ingredients: cotton pads, foil and rich cream.
Removal method using caps:
- It is necessary to cut out original blanks from cotton pads that follow the shape of the nail plate so that the acetone has as little contact with the skin as possible. You can do it even simpler and cut the cotton pad into four parts, so you get four “petals”.
- If time is limited, you can file away a little of the top coating so that the acetone penetrates faster. This must be done very carefully so as not to damage the nail plate.
- To protect the skin around the nail from the negative effects of acetone, you need to use a thick cream or Vaseline and generously spread the product onto the skin.
- It is important to soak cotton pads well with acetone, apply them to your nails and wrap them with foil on top.
- Usually 10-15 minutes is enough to completely remove the varnish. You can periodically massage your fingers, then the process will speed up a little.
- After this time, the foil must be pulled off your finger along with the cotton pad. All the glitter polish will remain on the cotton wool.
Small remnants of the coating can be removed using a wooden stick. You should not do this procedure with a metal pusher to avoid damaging the nail plate. Don't forget about the base coat, even if you use a polish without glitter.
It is the special base that protects the nail from damage, and before applying such a complex varnish as glitter varnish, its use will become more relevant. The tips given in the article will help remove nail polish and also protect the skin of your hands from drying out.
Source: https://plastika.guru/sovety/kak-bystro-snyat-lak-s-nogtey.html
How to remove varnish from headphone wires?
» Other »
Question for experts: how to remove varnish insulation from a wire (similar to headphones)*???
Sincerely, Lord Voldemort
Best answers
gently peel with a blade or a knife
It can be removed with a soldering iron, you just need to warm it up and scrape it off with a hot tip.
answer
This video will help you figure it out
Answers from experts
soldering iron on an aspirin tablet..
it will immediately get tinned..
Yes, a lighter will help.
The only thing is to try not to heat the core itself in the flame and immediately extinguish the melted insulation, don’t let it burn for a long time; in addition, there are special acids for soldering, they can be bought at any specialized store
and also drop a little rosin onto the matchbox (where it is shirked) and, while warming it up with solder, carefully pull the wire between the sting and the box
Immerse the wire with a soldering iron into the ASPIRIN tablet. It dissolves the varnish. Then tin the wire with rosin and solder it.
What kind of mess is this? You don’t need to stretch anything, and a well-heated soldering iron, on a piece of wood with drops of rosin, tins the ends of the wires perfectly without tricks, the varnish and braid burn out, pure copper remains and is perfectly tinned.
Hold a drop of solder on a heated soldering iron and immerse the tip of the wire there. The insulation will melt (and act like flux), and the wire will become tinned. You can simply scrape it with a knife (hold the wire on the board) and treat it with soldering acid, then tin it.
ALL MEMBERS FOR AN ADVANCED RESPONSE!!!! In especially serious cases, use formic acid, only after finishing soldering you MUST wash it off, otherwise it will eat the wires with the headphones and the listener’s ears)))!!!
Well, that's right. What is the point of mixing active fluxes here at all? They are for soldering on difficult-to-solder metals; they won’t help you apply solder to the varnish in any way, the main thing here is that the varnish burns off, and it burns out perfectly even during tinning.
I used to use a lighter myself out of inexperience, but it turns the copper sour and only gets worse.
But who admits that his hands come from his ass? This is definitely a bad soldering iron, or the flux is not right, they slipped the wrong solder and in general they were probably cursed, so you can’t tinker here at all, even with lump rosin you can do it in an amicable way, I personally do this. Well, the smell is more pleasant, again
I also clean it normally. And I don’t poison myself with aspirin. and in no way do I consider it a difficult task. Fix a phone that won’t turn on without a circuit diagram and with BGA chips and traces not visible under the earthen landfill, yes. So what’s next?
What was the point of filming a video and asking a question?
Is this such a difficult topic for you to deal with? This is for you, with your experience and knowledge. Have you decided to degrade?
Well, it's up to you to decide. I don't teach life. But somehow it’s not serious at all. Let's talk about twists and wags
Try it with a 20-30W regulator, try soldering it on the intermediary copper plate or put it on the wire Temperature is high, If the solder is not enough, try a screw connection Good luck Seryozha, Theoretically, patience and practically Calmness
Yes, at a tip temperature of 350-400 degrees, the varnish melts.
But you don’t know “how the rotor of a constant and variable motor differs.”
It wasn't a sheep who sneezed for you! And then, damn it - soldering is soldering. People, you understand, solve more serious problems! s touch.otvet.mail /question/196143038
Just don't teach me! I'm already a scientist
Hands do, eyes are afraid
Dear experts. Attention question. How to tin a headphone wire if it is not only varnished and insulated, but also has a nylon braid between them?
I always cleaned these varnished wires from the varnish with a sharp knife and even thinner ones, then I just tinned them with rosin
The soldering iron will burn the varnish, but the remaining varnish - carbon deposits interferes with tinning, it is necessary to use flux, but here all means are good except for peas.
Nowadays no one uses rosin anymore. There is a special alcohol solution
Source: https://dom-voprosov.ru/prochee/kak-snyat-lak-s-provodov-ot-naushnikov
How to remove varnish from a wooden surface correctly | Finishing experts
Gusevsky Andrey Anatolyevich
How to properly varnish wood
Varnish is used for decorative finishing of walls and other wood parts. It reliably protects surfaces from destruction and harmful climatic influences, which significantly increases the service life of the painted part.
In addition, the varnish additionally creates an attractive appearance for the products. But over time, the wood surface may need to be refinished, and then you need to learn how to remove old varnish from a wood surface. In this article we will look at the process of removing varnish from wood.
Features of varnish coating for wood
All varnishes for wooden surfaces are divided into categories, which depend on their properties and chemical composition. Before painting wood, you need to become familiar with the types of varnishes and the purposes for which they are intended.
Wood varnish can be:
- Water-based or water-based. This is a one-component varnish, odorless, can be applied in any way, diluted with water. Used for:
- furniture coverings;
- gender;
- outdoor works.
Advantages of the material:
- non-toxic;
- simply applied.
Flaws:
- It takes a long time to dry, about a day.
- Polyurethane. This is the most common varnish. It gained its popularity due to its optimal ratio of durability, drying time and cost. Such materials are one-component and two-component, which require the application of primer or are self-priming. These varnishes are diluted with solvents and have a pungent odor. It is applied for:
- all types of furniture;
- flooring, especially if increased abrasion resistance is required.
Benefits of coverage:
- dries relatively quickly;
- easy to apply;
- low price.
Flaws:
- contains toxic solvents.
- Nitrocellulose or nitro varnish. This is a popular type of varnish used for a wide range of technical works. Nitrovarnishes are used to coat mass-produced products that do not require increased wear resistance requirements. It is applied for:
- economy class furniture;
- small parts and products produced in large quantities.
Advantages:
- lowest cost;
- shortest drying time.
Flaws:
- not high wear resistance;
- low light fastness;
- The varnish peels off over time.
- Acrylov. This is a fairly popular type of varnish, used in industrial production, in works related to art, decoupage. Applicable:
- for furniture;
- for surfaces requiring high gloss;
- for manual work;
- for works of art.
Advantages of varnish:
- excellent light fastness;
- large selection of gloss finishes;
- increased strength.
Disadvantages include:
- high price;
- long drying time.
- Polyester. Very rarely used. The varnish contains several components. It can only be applied by spraying using a paint gun. It is applied for:
- musical instruments;
- covering surfaces that require a paint film of great thickness and gloss.
Advantages: thick coating can be applied. Disadvantages: difficult to apply, high toxicity.
- Shellac varnish. It is based on a special resin, which is left by insects on trees, and then the composition is assembled. To prepare the varnish, this resin is diluted with alcohol and then left to settle. It is applied for:
- furniture restoration;
- high gloss products.
Advantages:
- this is a unique coating that is used in the manufacture of antique furniture; – has no toxic elements;
- can cook with his own hands.
Flaws:
- low wear resistance;
- very high cost;
- only high gloss execution;
- very complex application technology.
Everyone chooses for themselves what paint to choose for applying to wood.
How to remove old varnish from wood
Before applying a new varnish coating to a wooden surface, it is necessary to remove the old varnish from the wooden surface.
There are several ways to remove varnish, and it depends on many factors:
- Type of base - will it be furniture or parquet on the floor.
- Varnish composition.
- Layer thickness. It is much easier to remove one layer than a large number of old coatings.
Chemical method of removing varnish
To remove varnish, you can use wood treatment with chemical compounds or remover. This is the most popular method for removing coatings from delicate surfaces on furniture or other delicate objects.
The chemical composition may be:
- Powder.
- Gel.
- Specialized liquid.
- Common solvent.
The specific option for removing nail polish depends on the task being performed.
For example:
- Denatured alcohol is used to remove shellac.
- Liquids are more suitable for surfaces with more than three layers applied. This is due to the fact that the liquid quickly evaporates from the surface, which is why it cannot be absorbed deeply enough.
- For large-scale work, powder chemistry would be the best choice - such materials can be preserved for a long time.
- To remove large numbers of layers of paint or varnish, it is best to use paste-like materials and gels.
Tip: Powders in this consistency are created for convenient storage and transportation. Before use, they should be diluted with water until a thick paste-like mass is formed.
It is best to apply the mixture to the surface in a vertical position. This is correct in technology and more convenient. Pastes and gels can remove up to ten layers of old varnish at a time.
Instructions for removing varnish from wood:
- The wash is applied. For this:
- the brush is wetted in the prepared chemical composition;
- the desired layer is applied to the surface. In this case, the brush must be applied to one place only once, without repetition.
- A polyethylene film is applied, which enhances the washing effect. The average time to obtain the effect of the compress depends on the number of layers of removal; it can range from one to 4 hours. If the remover has changed color or the varnish has turned dark brown or brownish, this indicates that it has begun to swell.
- The varnish is removed.
When the coating has become softer, it is removed with a spatula.
Removing varnish from a wooden surface
Tip: The new spatula has too sharp edges. Therefore, before use, they should be slightly rounded on a sharpening stone. After this, it will be possible to work with wood more carefully.
Press on the swollen material carefully. Most likely, it will not be possible to completely remove the varnish in one approach. In this case, you will need to repeat the operation again. Sometimes, to remove the remaining varnish film, it is enough to just walk over the surface with sandpaper.
- Neutralization of chemical composition.
The chemical composition remaining on the tree is washed off with ordinary clean water or a solution of vinegar in a ratio of 5:1. Residues of chemicals should be washed off thoroughly, but not for very long - moisture is harmful to wood. After washing, the surface is thoroughly wiped, and the product is transferred to a dry and well-ventilated place, avoiding direct sunlight. After drying, the surfaces can be re-varnished.
In addition to liquids, sprays in cans are used. After spraying them, a foam layer is obtained on the surface to be treated. Sprays are more convenient to use, but their disadvantage is that only minor layers can be washed off.
Advice: When working with chemical compounds, you should follow safety rules and organize good ventilation and ventilation in the room. To protect humans, gloves and respirators must be used.
Acetone is also used as a solvent. To do this, make a compress from a cloth that is thoroughly soaked in acetone. It is applied to the areas where the surface is cleaned. The compress is covered with plastic wrap and left for about 15 minutes.
Mechanical way to remove varnish
This method involves scraping the surface or removing a layer of varnish using a construction tool - a scraper, which is a sharpened steel plate with a handle. When working, the handle is located at an angle, which allows you to increase the pressure on the surface.
In addition, the varnish can be removed:
-
- Glass, but it quickly becomes dull, and when working it is necessary to protect your eyes with glasses.
- The thin varnish layer is removed with regular sandpaper. You can use it manually, or attach it to an angle grinder.
- Grinding machine. She may be:
- tape;
- vibration This is the most affordable tool. It can be used when cleaning furniture;
- eccentric.
When working: sandpaper is attached to the “sole”, which will be used to process the surface. This method of removing varnish is very dusty, but the surface after treatment, compared to the manual version, is much more aesthetically pleasing.
Tip: Don’t forget to protect your furnishings from dust. Regular plastic film is suitable for this.
The advantages of mechanical processing compared to chemicals are the absence of toxic and unpleasant-smelling substances. And when performing work, this cleaning method is more gentle on wood than chemical compounds. The disadvantage of this method is that it is time-consuming and labor-intensive.
Thermal nail polish remover
This process heats up the wood surface, which reduces the adhesion of the varnish to it. The coating begins to crack, and after prying it with a tool, chisel or spatula, the varnish is slowly removed, as can be seen in the photo.
Cleaning varnish from a wooden surface using a thermal method
When removing varnish using this method, you need to pay attention to some nuances:
- When performing work, you need to use protective equipment, gloves and goggles, and be sure to ventilate the room. This is due to the fact that when heated, the paintwork releases harmful toxic substances, and when the material is separated from the surface, pieces can bounce off. Don't forget about fire safety.
- After heating, if the varnish does not peel off, but only chars, you will need to change the cleaning method - in this case, you cannot do without chemicals.
To work you will need:
- Gas or petrol burner. The devices are not too expensive. But they must be used very carefully - the work is carried out with an open flame.
- Construction hairdryer. According to the principle of operation, it resembles an ordinary household one, but has greater temperature capabilities and can heat up to 600°C.
The advantage of the thermal method is its high speed. But if overheated, the wooden surface can ignite, which requires careful handling of the burner. In order to better understand the methods of removing varnish from a wooden surface, watch the video in this article.
Source: https://otdelka-expert.ru/kraska/udalenie-staroj-kraski/kak-snyat-lak-s-dereva-1305
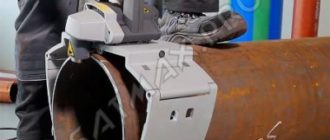
Stripping wires of insulation: removing insulation from cables
To connect wires to each other, connect to contact groups, or terminate (use terminals, sleeves, etc.), they must be stripped.
The tip of the cable, freed from insulation, becomes the weakest link in the entire multi-meter wiring. If the metal core loses its cross-section or strength, the characteristics laid down by the manufacturer will be nullified. How to remove insulation from a wire without damaging its properties?
When applying a protective coating, you have to solve opposite problems. The shell should be strong but flexible. Provide protection from moisture penetration, while at the same time being easy to remove from the core.
What damage can be caused to the current-carrying conductor by careless stripping?
- Reducing the diameter (and therefore cross-section) of the conductor.
- The appearance of fractures, and therefore a decrease in strength.
- The appearance of hidden damage due to bending and stretching.
- Reducing the number of wires in multi-core cables.
- Left fragments of insulation on the surface of a current-carrying conductor.
Most experienced electricians have their own secrets for cleaning wires from insulation: some remove the sheath with their teeth, many have a special (or rather favorite) tool.
All methods are good if the conductor does not suffer and there is no damage to health. We will tell you about the correct technique.
How to strip a wire while maintaining its properties
Let's start with simple methods.
Knife
A universal tool is used: a regular pen or office tool.
- Suitable for PVC and rubber insulation. Wire cross-section from 0.5 to 4.0. Press your thumb against the knife blade (across), and with a sharp movement remove the shell. Quickly, effectively, with certain skills - without damaging the conductor. A thin wire can be stripped with a simple movement; for a cross-section of 2.5 and above, it would be better to make a circular cut of the insulation across the cut. The main thing is not to push the sheath through to the conductor. You can place the wire on a flat surface (for example, a workbench) and roll it, pressing a knife to the stripping point. This makes it easier to control the depth of the cut. The cut tip can be removed using the various indentations on the pocket knife.
- The next method is a longitudinal cut. The insulation is cut with a stationery or construction knife along the conductor. The cut is not through, the metal should not be touched. Then the shell is bent and cut off. If the cable has a double (triple) sheath, this is the only sure way to remove the top layer. The internal insulation can be stripped in the same way.
- If there is a risk of damaging the conductor with a transverse cut, the following method is used: the wire is bent to a small radius, and a tangential cut is made across the sheath. The incision opens easily, and both the outer and inner membrane can be removed. The main thing is not to overdo it, otherwise you can damage the entire wire.
- If the insulation adheres too tightly to the conductor and cannot be removed after a longitudinal cut, you can simply strip the cable like a pencil. This method of removing insulation from a cable is also used on thin conductors with a cross-section of less than 0.75. It is important that the knife blade is sharp enough. The cutting tool moves almost parallel to the conductor; it is advisable not to touch the edge of the metal conductor.
Improving the use of knives, many electricians make homemade devices for stripping insulation. For example, you can use a safety razor blade by simply screwing it to a clothespin.
Using holes of different diameters (on a clothespin), you get a universal tool for removing both the outer sheath and the coating directly on the conductors.
The simplest factory-made insulation stripping pliers work on this principle. The outer sheath is removed using calibrated holes, and conductors of small diameter are stripped using a blade with a molded hole.
Thermal method
If the question arises: how to quickly remove insulation from a wire, all means are good. Many craftsmen simply burn the ends of the conductors with a lighter or match. The method is not the best: Firstly, the cable may catch fire. Secondly, the remaining part of the shell loses its properties at a distance of 1–2 cm from the cleaned area. And finally, the conductor itself (copper or aluminum) is destroyed by such thermal effects.
Important! If a thermal method of processing conductors is used, it is necessary to ensure ventilation of the room. Any coating emits toxic smoke when heated.
If you need to quickly strip the wire, but there are no cutting tools, you can use a soldering iron. The tip of the conductor is burned with a hot tip, after which the insulation is easily removed.
There are thermal tools of industrial design.
Stripping the wires of insulation is carried out as follows: the heating elements are pressed to the cut point, the sheath is melted with a short pulse, the conductor remains untouched. Such devices can be stand-alone or part of soldering stations.
Advantage of wire thermocouples:
- Heating occurs pointwise; the copper or aluminum core does not change its properties.
- A thin melt line does not lead to waste of material.
- A sealed ring is formed around the shell, preventing the penetration of moisture.
The only limitation is the insulation material. Thermal stripping is used only in cables with polyvinyl chloride insulation. The fluoroplastic or rubber shell can only be removed mechanically.
Mechanical devices for stripping industrial wires
The most popular electrician tool is the “Insulation Stripping Complex”, known by the abbreviation KSI.
The operating principle is as follows:
During the initial compression of the pliers, the conductor is clamped between the grooved jaws (as in pliers), the other end is captured by the knife mechanism. The cutting attachment is spring-loaded and does not cut through the shell to the metal. This way the current-carrying core is guaranteed to be preserved. Next, the working levers are separated, and the notched sheath is removed from the wire.
The length of the area to be stripped is set using a limiter, against which the front wire rests when inserted into the tool.
There are certain restrictions: the tip cannot be too long. If you need to clean a long area, the process is repeated several times. In this case, the wire does not rest against the limiter, and the shifted section of the sheath is removed manually.
The complex copes well with both mono conductors and multi-core cores. There are restrictions on the diameter of the wire: a cable with a cross-section of more than 4.0 is almost impossible to process.
The next tool is simpler. End pliers for stripping insulation.
Designed for a diameter of up to 6.0 squares; it is difficult to expose a thicker wire manually. Between the cutting tips there is a screw stop, with which the diameter of the conductor is set.
The distance between the grips is chosen to be slightly larger than the diameter of the current-carrying conductor. This is done to reduce the risk of damaging the metal. After squeezing the handles, the sheath is removed with a sharp movement along the wire.
Working with such a device is not as convenient as with a CSI, but this is justified by its low cost.
Nippers, or the cutting sector of pliers, work in a similar way. Only stripping the wire with their help requires some skill.
The following device is designed to work with large diameter cables. This is a complex knife with a grip.
It can be used to strip wires of any length. First, a transverse incision is made, then a longitudinal one.
After which the sheath is easily removed without damaging the central conductor.
Stripping varnish-coated conductors
Such a conductor is used in transformer windings. Instead of a dielectric sheath, a thin varnish coating is applied to the copper core. The conductor is cleaned with a knife or sandpaper.
Security measures
A conductor stripped of insulation is potentially a source of danger. After processing the wire, especially in places where it is pressed and scored, the insulation resistance should be measured. This is done when putting the electrical installation into operation, then the frequency of measuring the electrical wiring insulation is carried out according to the approved schedule.
If there is damage that reduces the protective ability of the shell, it is necessary to cut off the damaged area or put a dielectric casing on it.
That's all we wanted to say about it. To fully understand the issue, we recommend watching the video.
Source: https://ProFazu.ru/provodka/montazh/zachistka-provodov-ot-izolyatsii.html
How to remove varnish from a car
Modern car manufacturers use high-quality and reliable paints and varnishes for painting, as well as innovative methods of applying them. Therefore, the varnish coating on the car holds up well.
But despite this, during accidents, scratches and chips appear on the body that need to be disguised. To begin repair work, you need to prepare the car and remove the old paint quickly and without damaging the body.
Removal methods
There are several methods that will help remove old paint from a car body. When choosing one, you should consider the location and size of the scratches or paint chips. It should also be taken into account that each method will require special tools. Regardless of the chosen method of removing old varnish, you should follow safety rules.
Mechanical removal method
This method allows you to remove old paint from a car quickly enough. At the same time, rust and scale from welding are removed along with paint and varnish. Therefore, the mechanical method of removing old varnish is the most practical for major body repairs.
To remove old paint from a car you will need the following tools:
- sandblasting machine;
- Bulgarian;
- wire brush.
A brush with wire bristles is placed on the grinder, after which you can remove the varnish from the surface of the car using gentle rotational movements.
Removing paint from a car using a sandblaster is completely different. Water or air is supplied through it with the addition of small abrasive particles. It is important that the mixture is supplied under high pressure.
Metal shavings, corundum or small rocks are used as abrasive materials. Hard grains of sand do an excellent job of removing old varnish, as well as corrosion. After sandblasting a car, the surface becomes rough.
Thanks to this, the subsequent coating will adhere well.
Despite the advantages that removing old varnish with a sandblasting machine provides, it is used extremely rarely in everyday life, since the device is quite expensive. Investing in expensive equipment for one-time repairs is unprofitable.
In addition to the methods described, mechanical cleaning can be done manually. To do this, you can use a file, sandpaper, sanding mesh or scrapers. This method is convenient if you need to remove old varnish from a small area or in hard-to-reach places where another tool is missing. At the beginning of the work, the area is cleaned with coarse sandpaper. After this, use fine-grit sandpaper.
This method of removing old coating from the surface of the body gives a uniform result and is excellent for removing old paint and varnish.
Important! For the best effect, it is necessary to degrease the body before mechanical cleaning.
How to remove old paint from a car using this method? The operating principle of this method is based on uniform heating of the metal. When exposed to high temperatures, the paint becomes soft and begins to peel off the metal surface.
Then it is removed using a wide spatula. To warm up the surface of the body, use a gas burner, lamp or industrial hair dryer. It is important to choose the optimal heating temperature, because if the material is overheated, it can become deformed.
Important! For high-quality results when carrying out work, it is necessary to evenly heat the surface. Otherwise, the paintwork will peel off unevenly and you will have to repeat the procedure several times.
Despite the high efficiency of this method, it has a significant drawback - heated materials release toxic substances into the environment. To prevent poisoning of the body by toxic fumes, all work should be performed outdoors or in a well-ventilated area.
Chemical method of removing paint
For the procedure, special chemicals are used - acidic and alkaline solutions, as well as other solvents. The method is convenient because it does not require the use of expensive tools.
How to remove paint from a car using a chemical method? To do this, you need to apply the selected mixture to the surface of the body with a brush and wait for the time specified in the instructions (in most cases, the composition enters into a chemical reaction five minutes after application). If after the procedure the paint is not completely removed, the application process can be repeated. When the paint coating has softened, it is removed with a wide spatula, and the residue is washed off with high water pressure.
Note! When choosing a paint, check with your consultant whether it eliminates your type of painting.
How to remove varnish from headlights
There are several ways to remove varnish from car headlights:
- using sandpaper with varying degrees of abrasiveness, but without enough experience, you can damage the headlight;
- moisten a soft rag in the brake fluid and apply it to the headlight for a while (only removes light tint, otherwise a useless method);
- using special products to remove tint from headlights.
The last method is the safest, as it does not harm the plastic.
This video will show you how to remove paint from a car:
Source: https://mashintop.ru/articles.php?id=2947
How to Remove Nail Polish: 13 Most Effective Removal Methods
For every girl or woman, well-groomed hands with a neat manicure are pride. In addition, any person, man or woman, pays attention to their appearance, including the condition of their hands.
At the moment, you can get your hands in order both in a nail salon and at home.
Surely every girl in the process of caring for her nails has encountered the problem of lack of nail polish remover. Many panic and run to the store for the appropriate product, while others, on the contrary, use improvised means that are in no way inferior to nail polish remover.
The easiest way to remove nail polish is to use nail polish remover. Despite the fact that liquids cope with their task with a bang, they can affect the structure of the nail and its growth. Therefore, you need to choose high-quality products with a minimum acetone content.
How to remove nail polish at home? There are many different methods that women have used over the years when they don't have nail polish remover on hand.
The most common methods
- The varnish from the nail plate can be removed using another varnish (any color, since this is not at all important). You need to apply a layer of varnish over the old one, wait a few seconds and remove everything with a cotton pad. Since the process is very messy, you need to stock up on cotton swabs and pads to immediately remove the polish from the skin.
- You can use hairspray.
You should soak a cotton pad with varnish and try to remove everything from the nail very quickly. The process is far from safe, since hairspray dries very quickly and can get on the skin of your hands and damage it, causing an allergic reaction and general discomfort. If such undesirable consequences do occur, you should immediately wash off the hairspray from the skin of your hands.
- To remove nail polish, you can use regular deodorant by spraying it on a tissue or cotton pad. They should rub the nail vigorously until the polish disappears. This manipulation can also be considered unsafe, since it is harmful to both the skin and nails. And if you inhaled the smell of deodorant throughout the entire process, then the risk of mild poisoning from volatile vapors cannot be ruled out.
- You can erase old manicure using regular perfume . You need to wet a cotton swab with perfume and carefully remove the nail polish. Be patient, as this is quite a labor-intensive method.
- One of the old, classic ways to remove nail polish is use of alcohol.
In the same way as in the previous version, you should moisten a cotton pad with alcohol and treat your nail with it until the varnish completely disappears. If you are afraid to use alcohol on your nails, then you can go to the previous option, it is a little safer.
- You can remove nail polish with sunflower oil.
You need to apply a small amount of vegetable oil to the nail plate, wait about twenty minutes, and then remove the polish with a cotton swab.
- You can use improvised means such as vinegar and sparkling water.. You need to mix the ingredients in a bowl and place your fingers there for a few minutes. After that, your hands should be washed and dried, and then carefully wipe off the nail polish with dry cotton wool.
- You can use one of the common products - lemon juice or citric acid . You need to moisten a cotton pad with lemon juice and wipe your nails with it, in a short time you will notice a result that will please you.
- Nail polish can be removed even by hand washing.. If you hand wash things in hot soapy water, the polish will swell and separate from the nail.
This method does not require any special effort or expense, but you will have to wash a lot of things by hand.
- You can remove nail polish with organic solvents such as turpentine, gasoline, white spirit. Such products are very effective, but have an adverse effect on the hands and nail structure. They can leave yellow spots on the skin.
- Hydrogen peroxide is quite suitable for removing unsuccessful or old manicure . It is necessary to moisten the cotton wool with it and rub the nail until the varnish comes off completely.
- Using toothpaste to remove nail polish is one of the safest and most effective methods.
You need to take a large amount of toothpaste (preferably white, as it will cope with the colored pigment of the nail polish with a bang), apply it to a cotton pad and intensively process the nail until the nail polish disappears. The effect will increase if you add a small amount of baking soda to the toothpaste.
- Some women, in the fight against outdated varnish, resort to the use of alcoholic beverages. But this method is very risky for your nails. Alcohol damages the skin of your hands and nails. Recovery of nail plates after manipulation with alcohol is very long and difficult.
Harm from aggressive removal methods
Many women and girls who use aggressive and toxic substances to get rid of old manicure make a huge mistake.
Removing nail polish with white spirit, paint thinner, or gasoline can cause serious skin diseases, ranging from allergies to toxic poisoning of the body.
Also, the use of such products has a strong effect on the respiratory tract, so if you decide to use them, the process should be carried out in a well-ventilated area.
You should protect your hand skin with a towel or protective film. They are used to wrap brushes, as in the process the skin can turn yellow, and the resulting yellowness is very difficult to remove without the use of chemicals.
Non-standard use of gasoline and white spirit poses a serious danger to the human body.
Pregnant women and people susceptible to allergic reactions and respiratory diseases are at particular risk.
That is why it is recommended to use safer and gentler products that do not pose a threat to your health.
There are a huge variety of means and methods for removing old manicure, so you shouldn’t resort to the most extreme options.
Choose harmless products and protect yourself from high costs and serious risks to your health. In this case, you will keep your nails healthy and beautiful, earning the approval of both men and women. After all, as you know, a manicure for a girl is a calling card and a sign of well-groomedness and femininity.
You may also like
Other articles from partners
Source: https://adella.ru/beauty/kak-steret-lak.html
How to remove nail polish without nail polish remover at home: 14 ways
It is necessary to take care of your hands, because peeling varnish looks extremely unsightly. Today we'll look at how to remove nail polish if you're trying to get by without nail polish remover. Since all manipulations are carried out at home, we will use improvised means.
Ways to remove nail polish without special liquid
In the question of how to remove varnish without liquid, you will have to use what you have at home. To remove nail polish, you will need perfume, deodorant, gasoline, etc. At home, you may have to do several approaches.
No. 1. Deodorant
You need to take deodorant with a dispenser, spraying it onto a tissue or cosmetic sponge. After the cotton wool is generously moistened, begin to intensively rub the nail plates. Change the pads regularly when they become dirty, and try not to inhale the vapors while using the deodorant.
No. 2. Clear varnish
Spread the transparent base over the old coating, wait 3 seconds, and immediately begin removing the composition from the nails. Manipulations are carried out in several stages until the result is achieved. Since the clear base contains a solvent, it will remove any remaining old varnish.
No. 3. Vegetable oil
Use any oil you have in your kitchen. Fill a bowl with it, heat it to a comfortable temperature and immerse the phalanges in the bath. Wait 20 minutes, then take out your fingers one by one and go over your nails with cosmetic sponges. You can pry off the coating with a stick.
No. 4. Hair fixation spray
Before removing varnish without liquid using this method, select a ventilated area. A balcony or other suitable place at home is suitable for removing nail polish. So, protect the periungual ridges with a rich cream. Arm yourself with a fixative varnish, spray it over the plates and quickly wipe off the coating with sponges. Then do the same with the other fingers.
No. 5. Vinegar + soda
Prepare regular vinegar, the concentration of which does not exceed 6%. Combine it with soda in a 60:40 ratio. Dip your fingers into the mixture, wait 4 minutes and remove. Remove the coating with cosmetic sponges. To avoid damaging the skin, it is advisable to lubricate it with a rich cream before immersing in liquid.
No. 6. Handwash
The old coating, which has already begun to peel off on the nail plates, will finish the job with regular hand washing. Prepare a mountain of laundry and start washing it by hand. Literally after half an hour of rinsing and squeezing, the coating will slide off.
No. 7. Gasoline/white spirit, etc.
Use an industrial solvent or its equivalent. It is enough to soak cosmetic sponges in gasoline, kerosene, turpentine, white spirit, etc., and then go over your nails.
No. 8. Toothpaste
Allows you to deal with the problem effectively and safely. Since removing varnish without liquid is quite simple, it is worth using this method. To remove nail polish, use cotton pads at home. Apply a lot of paste without any impurities on them. Start rubbing your nail plate. Carry out the procedure until you achieve results. To enhance the effect, add a little baking soda.
No. 9. Strong alcohol
The method is considered not very safe in relation to the nail plate. Also, strong alcohol has a negative effect on the skin. Soak a cotton sponge in vodka/cognac and begin removing the coating. Keep in mind that it will take a long time to restore your nails after this.
No. 10. Perfume/cologne
If you still have old cologne or unnecessary perfume, you can use this composition. The principle remains the same. Dampen the cotton wool and start rubbing your nails until the coating disappears completely. It will take a lot of time.
No. 11. Alcohol
This method is quite old, it is comparable to the use of alcohol. You risk damaging your nail plate and skin. Moisten the cotton wool and proceed with removal in the same way as the previous options.
No. 12. Lemon juice
If you don't know how to remove nail polish without liquid, you should do it with citrus juice. To remove nail polish, soak a cotton sponge in lemon juice and rub your nails vigorously. At home, the result is achieved quite quickly.
No. 13. Hydrogen peroxide
Soak the cotton wool in peroxide and begin rubbing the coating. Carry out the procedure until you are satisfied with the result.
No. 14. Nail polish remover pencil
If you do not want to injure the nail plate with liquids, you should take care of purchasing a special pencil in advance. This product can be purchased at any cosmetic store. Run the pencil over your painted nails and you're done.
To get rid of nail polish, you don't have to use nail polish remover. There are many solutions listed above that you can try at home.
Source: https://more-vsego.net/kak-snjat-lak-bez-zhidkosti-dlja-snjatija-laka-v-domashnih-uslovijah-14-sposobov.html
How to easily remove gel polish or shellac at home
Shellac or gel polish is one of the most popular long-term nail coatings, the application of which requires certain skills. If this procedure is most often performed in salons, then removing such a product from the nail surface is quite possible at home .
Removing gel polish or shellac coating
The basis of shellac (Shellac from Creative Nail Design, made in the USA) is a natural resin , thanks to which it is quite durable. Shellac or gel polish can stay on nails for 2 weeks or more. Article - how long does gel polish or shellac last? You need to understand that shellac is just one of the brands of gel polish manufacturers. As Pampers is one of the manufacturers of disposable diapers.
To remove this coating from nails in a salon, use a special product necessary to soften it - Product Remover , or carefully file off the coating with a milling cutter.
The master saturates the sponges with the liquid and places them on the nail plates, after which he wraps the fingertips in foil to secure them.
After 10-15 minutes, remove the fingers one by one from the overlays and, using an orange stick, carefully pry off the coating - it easily comes off the nail surface. Otherwise the process is repeated. Irregularities in the nails are removed using a soft file or buff.
Methods for removing shellac or gel polish at home
In order to remove shellac from nails at home, you can use both professional liquid and other improvised means . This coating is usually removed using:
- regular nail polish remover;
- soaking nails in nail polish remover or isopropyl alcohol;
- files or buff.
It’s much easier for those who have a special tool. But what if you don’t have it at hand at the right time, and for some reason going to the salon is impossible?
Method number 1: Regular nail polish remover
The special product can be replaced with concentrated liquid for removing regular nail polish. Just pay attention: such a product must contain acetone . Other means will not work - they will not be able to soften the shellac even minimally.
| If there is no such liquid, then pure acetone or isopropyl alcohol will do. But the time that cotton pads soaked in these products remain on the nails is significantly reduced. |
For the removal procedure you need:
- Cotton pads or cotton wool.
- Regular foil, adhesive tape, tape - these will be needed to secure the cotton pads. Some people use polyethylene for these purposes, but it is not very convenient.
- Acetone nail polish remover, acetone or isopropyl alcohol.
- Orange sticks.
- File.
Source: https://nails-health.ru/kak-snyat-shellak-gel-lak/
How to remove gel polish yourself without losing your nails
Some gel polishes begin to bend around the cuticle after just a few days. Usually the problem is either in the varnish itself, or in the fact that the nail technician did not degrease the nails enough. You want to tear off this shiny record, but you can’t. The gel penetrates into all irregularities, so by peeling it off, you can turn a small scratch into a full-fledged crack. And this applies not only to the tip of the nail.
Take it from the person who ignored this advice: a crack at the base of your nail is a very unpleasant thing. It's painful, very unsightly and simply unhealthy. And a healthy nail takes forever to grow.
As much as you might like, don't peel off the polish.
The exception is the gel that is not completely dried. Peel it off calmly and wash off the residue with acetone. How can you tell if the varnish is under-dried? It's simple: the nails smell unpleasant, they stick to everything, the polish smudges.
After completing the manicure, press on each nail with the pad of your finger and move it slightly to the sides. Don't be afraid to ruin something: if the varnish is dried correctly, nothing bad will happen. If something is done wrong, it will not dry without a lamp. The top layer may be hard, but the colored one is half-baked. This type of coating will not last long.
If you encounter this, feel free to file a complaint with the master. Either he was too lazy to apply several thin layers instead of one thick one, or he didn’t spend enough time drying, or he used a low-quality lamp. In any case, you need to get rid of this as soon as possible, because the varnish can get into your food or stain your clothes.
How to remove gel polish using acetone and foil
A simple and inexpensive way for those who don’t want to run to the store for special devices. But it also has a downside: acetone dries out your nails.
hochu.ua
You will need
- cotton pads;
- nail polish remover with acetone;
- nail file;
- cream or Vaseline;
- foil.
How to remove gel polish
Cut blanks from cotton pads that follow the shape of your nails so that the acetone has less contact with the skin.
-Yuliya GoodNails channel
File off as much of the varnish as possible with a nail file. This will make it easier for acetone to penetrate the gel, and the duration of the procedure will be reduced.
To protect the skin around the nail from acetone, lubricate it with Vaseline or rich baby cream.
-Yuliya GoodNails channel
Soak the cotton balls well with nail polish remover (you can use it without acetone, but the effect will be worse), apply them to your nails and wrap them with foil on top - this way the active substance will not evaporate.
-Yuliya GoodNails channel
Well, now the most boring part. Wait 15-20 minutes, occasionally massaging your fingertips to speed up the process.
When the time is up, simply pull the foil and cotton wool off your fingers - the varnish should come off along with them. If that doesn't help, try gently picking up the gel with an orange stick. If it doesn't work, repeat the process.
-Yuliya GoodNails channel
You can see how to remove gel polish correctly in this video.
How to remove gel polish with a special device
A more reliable, faster and gentler method for nails and skin than soaking with acetone. But you will have to acquire a special device and experience in handling it.
How to remove gel polish with special wipes
Such wipes can be easily found on AliExpress or in cosmetic stores, and then carried with you and used, including for removing regular nail polish. However, gel polish is not always removed on the first try and there is a risk of drying out your nails.
brookenails.blogspot.ru
You will need
- nail wipes;
- cream or Vaseline;
- orange stick;
- nail file
Each package contains several individual bags, each of which contains a lint-free wipe soaked in acetone. The inside of the bag is made of a material resembling regular foil.
File off the top layer of gel with a nail file. Treat the skin around your nails with a rich cream. Cut off one edge of the bag, take out a napkin and wrap it around your nail. Now put the bag on your finger and gently press it so that it does not fly off.
Wait 15 minutes and check if the varnish is removed. If it is in place, try to gently pick it up with an orange stick. Repeat the procedure if necessary. Just add nail polish remover to the already used bag and put it on your finger again.
What to do after removing gel polish
After removing the gel polish, your nails can look simply terrible, because there is a high chance of drying them out. Don't be alarmed, just apply a special nail oil to your nails and cuticles. You can find this in any cosmetic store.
If you don’t have it on hand, the usual one will do. The effect will not be so noticeable, but a couple of repetitions and your nails will be almost as good as new.
And be sure to give your nails a day or two to rest from polish. If the thought of this seems blasphemous, use a clear caring varnish from the pharmacy.
Use oil
The less oil in the nails, the longer the gel lasts. Therefore, before applying varnish, nails are treated with a special drying agent. If you skip this step or do something more radical and apply oil to your nails half an hour before the manicure, the gel will be removed much faster and easier. True, a manicure can go bad at the most inopportune moment.
Use a special database
It will be even easier to remove gel polish if you treat your nails with Peel Off Base Coat (translated into Russian as a peeling base layer) before applying it. The base will protect your nails and eliminate the smell of acetone. But the gel will last less: after two or three days the varnish will begin to break off in large pieces. Especially after a hot shower.
lily.fi
Apply a coat of base and wait until it dries completely. Usually the base will become transparent when it dries, but it is better to check the instructions on the package. Now you can apply gel polish.
To get rid of the colored coating, it will be enough to pick it up with an orange stick. Depending on the quality of the base, the gel will be removed either entirely or in large pieces.
Some people use PVA as an alternative. But the glue is removed only in pieces, takes a long time to dry, and also tends to roll up into droplets on your finger. You can get rid of this effect by diluting the glue with water and applying it using an old varnish brush.
Source: https://Lifehacker.ru/kak-snyat-gel/