Useful accessories for a screwdriver
A screwdriver is a device necessary not only in everyday life, but also in specialized areas of life. In itself, it is indispensable, but nowadays special devices for a screwdriver have been invented that make its work more efficient and productive. This makes it possible to create a universal tool, using it for unusual tasks in the future.
Magnetic attachment
When using a screwdriver, you often have to hold the screws so that they do not fall off the bit, thus risking the safety of your fingers. If handled carelessly, you can get, if not serious, then unpleasant injury.
The magnetic attachment makes it possible to hold the screws in place even with rough handling. Ideal for vertical drilling.
Stripping and twisting - 2 in 1
In order to connect wire strands, you must first clear them of insulation. After this you need to twist them. This is all a slow process that sometimes takes forever. But the original nozzle will cope with this work in the shortest period of time. This equipment is ideal for cleaning and twisting wires.
Chamfering
This tool is similar in external design to a pencil sharpener. It is used for chamfering rods and other rolled metal with a round cross-section. This will help with damaged threads or straighten the end of a cut bolt.
This device is extremely useful for cutting plastic and thin layers of metal. It is divided into two working areas and has a convenient handle that can be rearranged.
Drill sharpener
This device allows you to quickly and reliably sharpen drills at the correct angle without the risk of damaging them. It consists of a guide conductor and an abrasive, which rotates and sharpens. A reliable device that will be useful to any man.
Installation of rivets
A screwdriver with such an attachment can easily turn into a high-quality rivet tool. You won’t have to spend extra money on additional devices and allocate extra space for them. The tool does an excellent job and is highly popular.
Important! Each of the devices presented above can be easily purchased in specialized stores or in the Aliexpress online store.
Source: https://technosovet.ru/dlya-remonta/shurupovert/poleznye-prisposobleniya
All types of insulated PPE caps. Selection, characteristics, sizes
From the point of view of the current rules, wire twists can be roughly divided into two types:
Correct twists include those that are fixed in some way. The following can act as a retainer:
- PPE caps
- welding in the form of a point at the end of the twist
- soldering
- pressed sleeves
- screw terminals
Wires that are simply twisted without fixation are considered an incorrect connection element. It doesn’t matter how many turns you made, how beautifully you connected the wires - all this is outside the rules and prohibited. More details
Soldered and welded wires are considered the best connection, but for most they are simply not suitable due to the simple lack of necessary tools or skills.
If you decide to repair the wiring yourself, assemble the junction box and at the same time save on installation, without violating the current rules, then PPE caps are an ideal option.
Firstly, you don't need to buy any special tools. For example, expensive welding machines or press pliers.
View Secondly, you do not need to acquire any additional skills, as is the case with soldering or welding wires.
PPE stands for connecting insulating clamp. This type of caps came to us from the West. In America, this connection and method of insulating wires is considered the most common.
Moreover, foreign consumers have a much richer choice than we have.
Our manufacturers actually produce only two types of PPE:
- regular smooth PPE
- PPE caps with wings
In the West, as they say, you can choose one for all occasions. It is not clear why the Chinese have not yet jumped in and started producing the same thing for our market.
Here are the main 8 types of PPE caps that can be found there (taken from here).
This is a classic and reinforced (with wings) PPE that we are all familiar with:
PPE with an improved cap shape, providing more comfortable operation when screwing on:
PPE cap with low profile design for work in confined spaces or small junction boxes:
Low profile wing design for enhanced torque:
The next cap is a very controversial decision in my opinion, but it is also being released. PPE for connecting aluminum conductors to copper. The cap is filled with a special antioxidant that prevents oxidation:
Moisture-proof clamps that can be installed on wires in electrical cabinets on the facade of the house, or in wet rooms, and even directly in the ground in the garden:
They contain 100% silicone sealant that protects against moisture and corrosion.
There is no need for heat shrinkage or hermetically sealed insulation of joints.
PPE with a hole in the top of the cap.
This is not a defect at all, as it might seem at first glance, but a clamp specially designed for twisting grounding conductors. One of them is brought out through a hole and connected to the body of the panel or equipment.
There are also similar clamps where the wire is pressed not by a spring, but by a screw connection.
There is also a device - a connector filled with silicone. Any PPE cap with wires can be placed inside it.
After this, this twist can easily be considered waterproof and placed underground - in the garden, near watering cans, when entering the house, etc.
Domestic and Chinese manufacturers produce PPE caps in 5 sizes from PPE-1 to PPE-5. The largest of them is designed for a total wire cross-section of up to 32mm2.
By the way, be more careful when choosing caps based on cross-sections. Some Chinese PPE may confuse you. On the cap itself it may be written that it is designed for up to 20mm2.
And on the packaging it is only up to 15mm2. It’s not clear what to believe.
Quality can be checked even by touch. Low-quality PPE is characterized by poor plastic that can burst during operation. You can distinguish it by simply squeezing it with your fingers.
More expensive and normal clamps, with difficulty, but are compressed under the force of two fingers. Low-quality options are rougher and much more difficult to compress.
Some people use pliers to help themselves when tightening the PPE. Again, with cheap Chinese caps, when doing this, a break may occur, or the spring may simply fall out.
A good PPE clamp can easily withstand the operating temperature range from -40 to +105 degrees.
Here are the markings and types of PPE caps with all the characteristics produced by the domestic manufacturer KVT:
The company also produces a reinforced version of the cap with ears or wings:
Caps with ears are of course much more convenient than simple ones, but here you need to proceed from the free space in the junction box. Since such ears can take up up to 20% of the space of the total area of the cap.
PPE, as well as sleeve and fork tips, can be distinguished by color. Each color corresponds to a specific wire section.
Using PPE, you can connect 4,5,6 wires, the main thing is that the total cross-section of the twist corresponds to the calculated purpose of the PPE.
In this case, you can safely twist wires of different sections. When crimping wires with sleeves, this causes real problems and difficulties.
You can select and order sets of PPE caps here.
Let's consider the twisting process itself when using PPE. First of all, you need to accurately select the desired clamp according to the cross-section of the wires. The quality of the connection will depend on this.
To do this, add up the total cross-section of the conductors that will be twisted inside the cap.
Let's say these are 3 wires of 1.5 mm2 each. This means the total twist cross-section is 4.5 mm2. Use the table to find the required cap.
In this case, you do not need to focus on extreme values so that there is no twisting, which is called end-to-end. In this case, the clamp simply will not work, or will work poorly, and the wires will get hot.
For our version of 4.5 mm2, it is better to choose SIZ-3, designed for twisting from 1.5 to 6 mm2. SIZ-2 in this case will not be the best choice.
Next, the whole process can be performed in two ways.
1 way to twist PPE
First, combine the wires. There is no need to pre-twist them or stack them on top of each other. Place them in a PPE cap.
Then you begin to press it inside the PPE and turn the cap itself clockwise until the spring releases. As soon as the spring has captured the wires, you can begin the process of twisting the wires.
If there is not enough manual effort, and the cap does not have “ears,” you can use pliers or even a screwdriver. The process will speed up significantly.
There is even a specially designed screwdriver attachment for quickly twisting wires using PPE. With this method, the cap remains completely undamaged.
You can, of course, adapt an ordinary “Shurik” for twisting without any adapters, but the outer insulating layer of the cap will be scratched.
2nd method of twisting PPE
The second method involves preliminary twisting of the stripped cores with pliers or again with a screwdriver.
Then you trim the ends for evenness, and only then screw the clamp onto the twisted wires.
Which method to choose depends on the cross-section of the conductors being connected.
Just try twisting together 4 GOST wires with a cross-section of at least 2.5 mm2 with your hands and a cap. The load on the cap and the spiral will be such that if you move it incorrectly, you can break it.
But twisting two 0.5mm2 wires into PPE is not very difficult.
What should the twist length be? According to the manufacturers' recommendations, the twist should be equal to or slightly less than the length of the cap itself (10-12mm).
IEK technical passport for PPE caps - download
Navigator technical passport for PPE caps - download
If you make it 3-4cm long, at first glance this should not affect the quality of the connection and its resistance. However, there is one caveat here. Namely, the dependence on the number of twisted wires.
The more there are, the more desirable it is to increase the twist length.
If you twist five wires at the same time, to a depth of the PPE cap of only 1.5 cm, then you will never be able to create the same area of contact of these wires, which is obtained with a twist length twice as long.
So be thoughtful about your approach. The main thing after this is to reliably insulate the remaining exposed part of the wire.
True, in this case it is no longer correct to call the connection PPE, since the cap itself no longer insulates the entire exposed core.
In any case and at any length, this twist is quite reliable and, thanks to the fixation with an insulated cap, the wires will not come loose during operation.
The main advantage of insulated PPE is that the plastic shell of the cap, unlike other types of insulation, provides three types of protection at once:
- electrical insulating
- fire protection
- mechanical
The undoubted advantage of insulated caps, compared to sleeves and tips, is their ability to be reused. For example, after temporarily connecting the wires, when connecting some portable equipment, the PPE cap can easily be twisted counterclockwise.
After which it can again be safely used on other equipment or object.
Another common use of PPE is the legalization of twists in old electrical boxes following regulations from fire inspectors.
The caps themselves are made from PVC plastic, which does not propagate combustion.
And this is one of the conditions for fire safety requirements for electrical equipment. Open the box, remove the electrical tape from the old twist and screw a new cap over the cores. True, you may come across twists made counterclockwise, so be careful.
The disadvantages of insulated PPE caps include the fact that they are not suitable for multi-core wires and are only applicable for mono-core wires.
Manufacturers also do not recommend twisting aluminum wires with them, indicating that this is primarily a clamp for copper.
Some companies, as mentioned above, produce universal PPE clamps designed for aluminum too. However, for the most part, their use for this particular metal is prohibited.
And sometimes it can lead to the following consequences:
Domestic PPE also does not provide a hermetically sealed connection. In a damp room, moisture can accumulate inside the cap, which gradually leads to rust and disruption of the compressive force of the spring.
To avoid this, you can insulate both the wires and the PPE cap itself with electrical tape.
Another inconvenience of such clamps is their dimensions. If there are a lot of wires in the junction box, then the PPE will take up a lot of free space inside. Sometimes this may even force you to replace the box with another, larger one.
In general, the choice in favor of insulated PPE caps is made primarily because of their cost-effectiveness and ease of installation. If you need a more reliable and durable connection, then invite professional electricians with all the necessary equipment.
Here is an interesting test of a PPE cap for mechanical load. The guy collected the wires in PPE and hung a punching bag from it, thereby checking how mechanically reliable this contact can be:
Source: https://domikelectrica.ru/vse-vidy-izolirovannyx-kolpachkov-siz/
Making the correct twist of wires
Wire twisting is one of the methods when it is necessary to make a branch or additional wiring connection. However, according to the PUE it is prohibited to use it. But knowing how to twist wires correctly, you can really avoid unforeseen incidents, especially short circuits, which often lead to fire.
Connecting wires
To ensure full electrical conductivity, the integrity of the wiring is an important point. Damage or poor-quality adhesion is unacceptable. It is important to ensure tight contact contacts and reliable connections in the “electrical node” areas. There are certain methods for eliminating breaks in cables. Among them, welding should be noted. It applies to copper and aluminum wires. This ensures a particularly reliable grip.
Connections can be divided into types:
- twist;
- welding;
- soldering;
- pressure testing;
- terminal blocks;
- self-clamping terminal blocks (WAGO terminals);
- PPE caps;
- bolt clamp.
Connection methods
The most complete connection for wires made of copper is soldering. It can be easily accomplished using flux (rosin, borax) and tin solder. Terminal blocks are also used - a special device that is made using screw terminals. They are selected separately in accordance with the cross-section of the cores.
Self-clamping terminal blocks are often used to save time on electrical installation work. In order to isolate a twisted or soldered electrical connection, PPE insulating caps are used. Today in the energy sector, WAGO terminals are widely used, which are produced for wires and cables of various diameters.
In addition, WAGO terminals allow you to connect conductors made of different materials (copper and aluminum).
The choice of which connection to use depends on various factors:
- material (steel, copper, aluminum);
- number of twisted elements;
- section;
- place of work (house, street, in the ground, etc.).
Types of twists
Reliable and tight twisting protects against unforeseen emergency situations. It is important to do it as correctly as possible. Even the slightest violation of safety regulations can cause a fire.
For this reason, the rules for the design of electrical equipment do not provide for the legal use of this method. Despite the ban, it is relevant both in production and in everyday life.
Existing types of wire twists can be used temporarily when, for some reason, a quick connection using safer methods is not possible.
There are simple methods by which the connection can be made safely and firmly. They are not difficult even for a beginner. When performing, it is possible to use both two wires and several. The following known types of twists are usually used:
- bandage;
- groove;
- simple branching method.
Types of wire twists
The above twisted electrical wires are completely reliable electrical connections. But implementation requires certain skills with hand tools. Self-training is available to every person who practices repairing electrical wires.
Bandage is one of the methods of twisting wires, often used in everyday life. It is characterized by the use of an additional segment, which is superimposed on the connected conductors. This is a good method for serial, parallel and branch connections.
Stranded
Beginners sometimes wonder: “how to connect single-core and stranded copper wire?” In fact, the main requirement is a tight and reliable fit of the cross-sectional area of the cores to each other.
Knowing how many wires can be twisted into one twist, you can quickly complete the task. The number of electrical conductors depends on their cross-section. The larger it is, the fewer wires are allowed to twist.
And vice versa: the smaller the cross-section of the conductive wires, the greater the number of wires that can be twisted.
Connecting stranded wires using the groove method is not difficult. This is an easier way to do the job than the “bandage”. In this connection, it is not necessary to use an additional piece of wiring. In this case, a complete connection of wires by twisting is carried out directly by the wires themselves. They are laid in parallel, in series or in a branch.
Before twisting the three wires together, it is necessary to remove the insulation from the ends of the wires and use a hand tool to twist them. It is permissible to use the “groove” and “bandage” methods, as well as a simple branch.
The maximum number of wires in a twist using the latter method depends on the diameter of the conductor. Even with the smallest diameter of the cores, their number should not be more than six. Novice electricians are wondering: “how to make a twist of 4 wires?”
It is most optimal to perform this action using the “groove” or “simple branch” method.
Twisting of wires according to the PUE
The twisting length of wires according to the PUE ranges from 3 cm to 6 cm, depending on their diameters.
Twisting single-core with stranded is carried out as follows:
- The ends are prepared at a distance of 4 cm to 8 cm.
- A multi-core current-carrying core is superimposed on a single-core one and wound up to a length of 4 cm.
Wire Twist Tool
This task requires certain tools. Among the mandatory ones:
Hydraulic manual press KVT “PGR-70”
You will also need a twisting attachment and insulation material. When working with these tools, it is imperative to comply with safety regulations. Certain job skills will be required.
Although in some cases it is possible to twist wires protected by insulation by hand, today a wire twister is usually used. It greatly simplifies the work and guarantees high quality results.
A work device such as pneumatic or hydraulic press jaws allows you to terminate conductive wires for further connection.
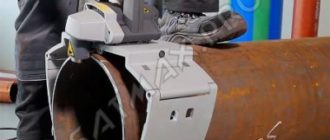
There are also small devices that allow you to speed up the twisting of the cores. Such a device is inserted into a screwdriver and twists them by rotating them.
Twisting devices
Connection isolation
An important requirement in the connection procedure is their isolation to avoid accidents. Insulating materials include:
- PVC tubes;
- insulating tape;
- heat shrink tubes;
- special twist insulator caps.
Wire insulation methods
Methods of insulating wires directly depend on the material used. They are divided into methods such as planting, reeling and heating. In the first case, the material is placed on the twisted segment. In the second, simple winding is performed using insulating tape. In the third, insulation with a heat-shrinkable tube involves placing it on the current-carrying part and then heating it.
To the question of beginners, “Is it possible to insulate wires with electrical tape?” should be answered unequivocally in the affirmative. This is one of the most common methods. The main requirement is compliance with the shelf life of the material and the absence of visible damage.
Despite the fact that at first glance the procedure for twisting electrically conductive wires seems simple, a responsible approach to the matter is required.
Source: https://domashnysvet.ru/elektroprovodka/delaem-pravilnuyu-skrutku-provodov
Device for Twisting Wires with a Screwdriver
Quick twisting of wires using a screwdriver
Zobrazit ovladače přehrávání
- December 16, 2017
- Review of three ways to twist wires using a screwdriver
- Věda a technology
- twisting wiresscrewwind
Komentáře 13
this is a very good way and you save money by doing the twisting , your hands get so tired
good twisting .
It won't work like that with aluminum.
Like for the video. An interesting device for twisting wires. Clear fixture with holes. However, it is much easier
When the time of the car is possible and even something else can be invented. Alas, during installation, sell on a stepladder under the ceiling.
I liked the option with PPE. An interesting device for twisting wires. Will come in handy
I liked it with the homemade stuff)))
Before making renovations in the apartment, I carefully began to study the material. Ultimately, after a month of hardware, I came to the conclusion that there is nothing better than crimping. A device for anyone who has ever soldered twists into action with a screwdriver or. Not counting welding, but you yourself understand what kind of hemorrhoid welding is.
A simple and convenient solution for twisting and welding wires? Device for. And the resistance is not much lower compared to crimping. But I put the sleeve on and crimped it with pliers, but it wasn’t ready. For centuries.
Not surprisingly, I was dismantling the old wiring in my apartment (the house was not wired in 1954) and what remains to be done for our client was that the connections were wired.
Quickly twist wires using a screwdriver
Review of three ways to twist wires using a screwdriver .
Obzorkin.RU sell, hung the car on the chandelier is not normal. And I’ll throw off the Soviet crimp for you to look at. The sockets are connected with a continuous wire)
I agree, crimping is the most reliable option, but in the apartment one thousand nine hundred and fifty-four years old, there are some doubts about crimping, our client has about 30 years left to make twists without soldering, there was no welding for decades, at the same time, the consumption currents were lower with good returns, and with the growth of consumption, the requirements do not increase; it is necessary to twist or solder in a different way; in general, the best way to make non-breakable connections is that there is a wire from the machine to each socket, but it will not be normal for lighting.
And you didn’t have to tear off the siz. How to make a device for twisting wires with your own device for twisting. There is no need to twist the wires at first, the SIZ must do this itself, then the correct connection will be obtained. Everything else needs to be boiled, or soldered, which means the quality of the twist does not matter.
PPE acts as a spring compression. nothing more. and twisting the wires must be done Without performing a high-quality installation, how to screw on PPE
Source: https://vdiweb.ru/prisposoblenie-dlja-skrutki-provodov-shurupovertom/
Is it possible to solder wires in a car? | | soulcar.ru
Everyone has probably observed the work and results of an auto electrician’s work. And everyone wondered why they never solder the wires in the car? Now we'll figure it out!
A little about twists
Twisting has received a bad reputation as a “collective farm repair” thanks to the inept actions of inexperienced auto electricians and the car owners themselves. As a rule, these connections unwind, expose the wires and cause a fire in the car.
In fact, proper twisting will never come undone and can even be stronger than soldering! In addition, twisting is the most ideal solution for installing additional devices. After all, it’s fast, reliable, and you can also remove this device later when selling the car. In addition, twisting allows you to create a connection in narrow spaces, for example, under a car dashboard, where a soldering iron cannot reach.
To perform twisting, it is enough to have insulating tape and wire cutters. When winding the wire, you need to pull the tape, so it sticks better, and at the end, press it tightly so that you don’t get “flags”, which then cling and unwind the tape.
After twisting, the wire is laid into a bundle and wound together with the bundle. Thus, the twist becomes invisible, durable and well protected from negative factors. More information about the correct execution of twists can be found here .
About soldering wires
It is still possible to solder wires in a car, but this should not be done in the traditional way, but only with the help of heat shrink and using special tools.
The wire is heat-shrinkable, then connected by soldering and cleaned of flux using electrical contact cleaner. Otherwise, the flux itself will cause the wires in the car to rot.
Only after this can the shrinkage be heated. In this case, you cannot use electrical tape. The electrical tape allows moisture to penetrate and cause the wires to rot.
Soldering is not suitable for narrow spaces and is quite labor-intensive and expensive. It is much easier to wrap the wires with electrical tape. But soldering can be used in the engine compartment, when repairing some car devices. Soldering is good for repairs, but additional... It is better to install the equipment using twists.
Photos taken from the Internet!
Source: https://drive2.su/%D0%BC%D0%BE%D0%B6%D0%BD%D0%BE-%D0%BB%D0%B8-%D0%B2-%D0%BC% D0%B0%D1%88%D0%B8%D0%BD%D0%B5-%D0%BF%D0%B0%D1%8F%D1%82%D1%8C-%D0%BF%D1%80% D0%BE%D0%B2%D0%BE%D0%B4%D0%B0/%D0%B0%D0%B2%D1%82%D0%BE%D1%8D%D0%BB%D0%B5%D0 %BA%D1%82%D1%80%D0%B8%D0%BA%D0%B0/
How to twist wires correctly? — Metals, equipment, instructions
Wire twisting is one of the methods when it is necessary to make a branch or additional wiring connection. However, according to the PUE it is prohibited to use it. But knowing how to twist wires correctly, you can really avoid unforeseen incidents, especially short circuits, which often lead to fire.
Ways to twist wires - electrician's advice - Electro Genius
Wire twisting is one of the methods when it is necessary to make a branch or additional wiring connection. However, according to the PUE it is prohibited to use it. But knowing how to twist wires correctly, you can really avoid unforeseen incidents, especially short circuits, which often lead to fire.
Twisting wires: how to twist wires correctly
Whatever they say about the process and methods of twisting wires, this method remains very relevant to this day and will remain for a long time. Why is that? Let's consider this topic in more detail.
With this method of connecting electrical conductors, there are a large number of nuances, advantages and disadvantages, including a ban on performing such operations according to the PUE regulations. However, it is worth noting that twisted wire connections are most often used.
There are many reasons, let's look at the most common ones.
Firstly, twisted connections are often used when performing “rough” installation. This is due to the fact that during the initial work the main goal is to check the functionality of the installed units. The presence of signal/voltage is checked (depending on the type of manipulation performed), additional work is carried out on the secondary wiring of additional elements, contacts of devices are displayed, such as:
- switches of various types;
- built-in voltage stabilizers;
- built-in voltage converters;
- built-in step-down/step-up transformers;
- regular sockets;
- "smart" sockets;
- power consumption monitoring devices;
- specialized sockets with special outputs (RJ-45, for example).
After carrying out the “rough” installation, it is extremely important to check the functionality of the above devices. And in case of their incorrect operation or lack of electricity/signal, you have to re-deal with a certain section of the circuit or re-carry out wiring operations and troubleshoot problems.
Secondly, this type of contact of conductors allows you to quickly restore the operation of the area and obtain the necessary electricity/signal for certain manipulations. In the future, depending on what devices will be connected to this area, it will be possible to:
- leave the completed twist;
- improve connection;
- replace this section with another one, with other connecting elements.
Thirdly, no special tools are required to twist the wires. Such manipulations can be performed even “in the field”, provided that no “gluttonous” electrical appliances are connected to the created area.
It is worth noting that twisted wires can provide fairly reliable contact for a long time, provided all necessary instructions are followed and the work is done correctly.
So, it is worth wisely taking into account the situation if you decide to resort to such a connecting method as twisting. It is necessary to take into account the connected load, select the optimal cross-section of wires and further calculate the circuit in case of a change in the number or power of consumers.
Advantages and disadvantages
Weaving wires together is probably the oldest method of merging conductors together. However, over time, the power of devices requiring high currents also increases. Twisting, as a rule, is not designed for them, but for home use it is very appropriate.
It is worth mentioning that this wiring option cannot be used with devices such as electric kettles, refrigerators, washing machines, heaters and fan heaters, electric stoves, and computers.
The main advantages of twisting are:
- speed of creation;
- durability (if done correctly);
- the ability to weave wires without additional tools;
- ideal for signal contact (in the absence of connecting high-current consumers);
- the ability to improve the connection using soldering;
- cheapness;
- the ability to combine two, three, four wires simultaneously;
- Possibility of reconnection.
Its disadvantages include the following:
- the need for isolation;
- operability only with low-current consumers;
- inconvenient installation;
- fire hazard if work is performed incorrectly;
- a large number of nuances that MUST be taken into account when weaving wires;
- “surges” of voltage and interference on electrical appliances when the area is overloaded.
As can be seen above, twisting has a limited range of use; it cannot be used with powerful devices, and when used with computers, modern televisions, audio equipment and other equipment of the 21st century, there is a problem with the occurrence of interference and “throws”. Therefore, it is advisable to weave wires when used with lighting devices (chandeliers, lamps, etc.), power adapters and other “weak” devices.
Connecting conductors from different materials
The most basic thing is that twisting is PROHIBITED with conductors made of different materials. It is PROHIBITED to weave copper and aluminum wires. This is due to the fact that when copper and aluminum come into contact, a galvanic couple appears, which destroys the created connection. The higher the current passing through the plexus, the faster its destruction will occur. Such contact of wires threatens with the following consequences:
- heating, sparking and subsequent combustion;
- deterioration in the quality of contact of such a “weave”;
- reducing the contact area;
- strong heating of the wires at the plexus;
- rapid oxidation;
- under temporary and powerful loads, “heating-cooling” cycles occur, which is fraught with severe
- deterioration in connection quality.
The appearance of an oxide film
The film appears as a result of the interaction between the oxygen environment of the air and the conductor. The metal conductors used to make connections are usually made of aluminum or copper and are quite susceptible to oxide film if the connection is not insulated. More expensive materials that are rarely used in electrical circuits, such as gold and platinum, do not have this disadvantage, but their cost is extremely high. An oxide film on wires has the following consequences:
- deterioration in the quality of twist contact;
- intensification of the heating process when current passes.
Dealing with this drawback is quite simple - it is necessary to carry out high-quality insulation of the twist.
The appearance of transient contact resistance
This resistance appears as a result of poor contact between the wires, which causes the temperature to increase greatly at the point where the current passes from one part to another. Transient contact resistance serves as a catalyst for the rapid destruction of the wire tangle, especially in the absence of insulation. To minimize transient contact resistance, the tightest contact between the two conductors should be made.
Types of twists and connections of this type
One of the advantages of such a connection as twisting is the possibility of improving it by soldering or welding. When soldering, the connection becomes strong and is able to withstand high currents; when welding, special equipment is used, which makes it possible to give strength to the completed connection. Soldering and welding of both copper and aluminum wires is an excellent way to improve its performance: reduce the thermal load by improving contact at the welding or soldering points.
When carrying out work, twists can be divided into several types depending on the materials, type of wire, type of twist. It is extremely important that the cross-sectional area of each of the conductors matches each other, and is also suitable for the load used.
Conductors can be made of the following materials:
Aluminum braiding is less resistant to further unwinding, while copper conductors can be unbraided and rebraided several times, for example, to add a third contact. Aluminum can withstand 1-2 times the load of twisting and unwinding, copper can be twisted and untwisted 3-4 times without any damage.
In this case, conductors can be divided into 2 types:
- with a monolithic core;
- stranded.
When performing the twisting process, it is worth considering the type of conductor, since the options for the plexus may be different. Depending on the type of wire, one or another twisting method should be used.
A cord with a monolithic core is usually used for stationary wiring, when there is no need to move equipment. Stranded conductors are often used for “rough” installation or where there is a need to move devices.
The twisting of both copper wires and aluminum wires is the same and is shown in the tables for each type of cord (stranded/single-core). If it is necessary to weave more than two conductors, for example 3-4, then first the initial twisting is performed for the two ends (shaping the connection) - 1-2 turns, after which the required number of conductors is added and twisted according to one pattern or another.
It is allowed to connect two conductors of different types (stranded/solid), but it is important to take into account the cross-sectional area of each conductor.
We twist it ourselves
During professional installation, special clamps are used to make the connection - PPE (connecting insulating clamp); when using them, the final twisting is allowed from the point of view of the PUE, but it is worth remembering that such a device is not designed for high currents.
So, how to properly twist wires at home? To carry out this manipulation you need:
- take into account all the nuances in advance (location, load of connected equipment, etc.);
- acquire the necessary tools (pliers, knife, sandpaper, heat shrink, it is advisable to have a hot air gun and a device for removing insulation, a screwdriver if available).
Let's consider the situation with weaving from a cord with a monolithic core:
- It is necessary to strip the ends of each wire by 3–4 cm using a special tool (stripper) or a construction knife. It is extremely important to remove the insulation and not leave deep cuts on the core.
- Then we put heat shrink on one of the ends.
- Then degrease the cleaned surfaces with alcohol/acetone/white spirit.
- Then, taking sandpaper, we clean the wire strands.
- We lay the wires parallel to each other and hold them with pliers.
- We weave (in accordance with the diagram) clockwise, at least 5 turns for one core. The wires must fit tightly to each other.
- We move the heat shrink to the contact point and warm it up with a hairdryer or lighter. It is important that the heat shrink fits tightly at the twisting site.
It is possible to hold one end of the cord with a screwdriver and slowly turn it, while weaving the other end onto the rotating end, creating tension with your hands, thereby making the connection tighter.
With a stranded cord the situation is a little different:
- We strip the ends of each wire by 3–4 cm using a special tool (stripper) or a construction knife. It is extremely important to carefully remove the insulation and not damage/cut off the cord cores.
- We put heat shrink on one end of the cord.
- We unravel the strands of each cord into small “braids”.
- We degrease the resulting “braids” with alcohol/acetone and so on.
- We lay the cores on top of each other from each cord.
- We weave together, making the connection tight (at least 5-6 turns per braid).
- We move the heat shrink to the place of twisting, warm it up with a hairdryer/lighter. The heat shrink should fit tightly at the joint.
If it is necessary to create a “braid” from monocore and multicore cords, the algorithm also changes, and it is highly advisable to weave using the “Branching” method:
- We strip the ends of each wire by 3–4 cm using a special tool (stripper) or a construction knife. We take care not to damage the cores of each cord.
- We put heat shrink on one of the cords.
- We degrease the cleaned areas with alcohol/acetone and so on.
- We bend the single-core end 180 degrees, so that it then presses the twist.
- We twist the multi-core cord around the single-core end in accordance with the diagram (clockwise), at least 5-6 turns, the more the better.
- We clamp the pre-bent end of the single-core wire and press it against the twist made with pliers.
- We move the heat shrink to the contact area and heat it with a hairdryer/lighter. We make sure that the heat shrink is well fixed at the twisting site.
At this point, we can consider the work done competently and efficiently. If you follow the instructions and take all necessary measures, you are guaranteed to get a high-quality connection for a long time.
Source: https://ProFazu.ru/provodka/montazh/skrutka-provodov.html